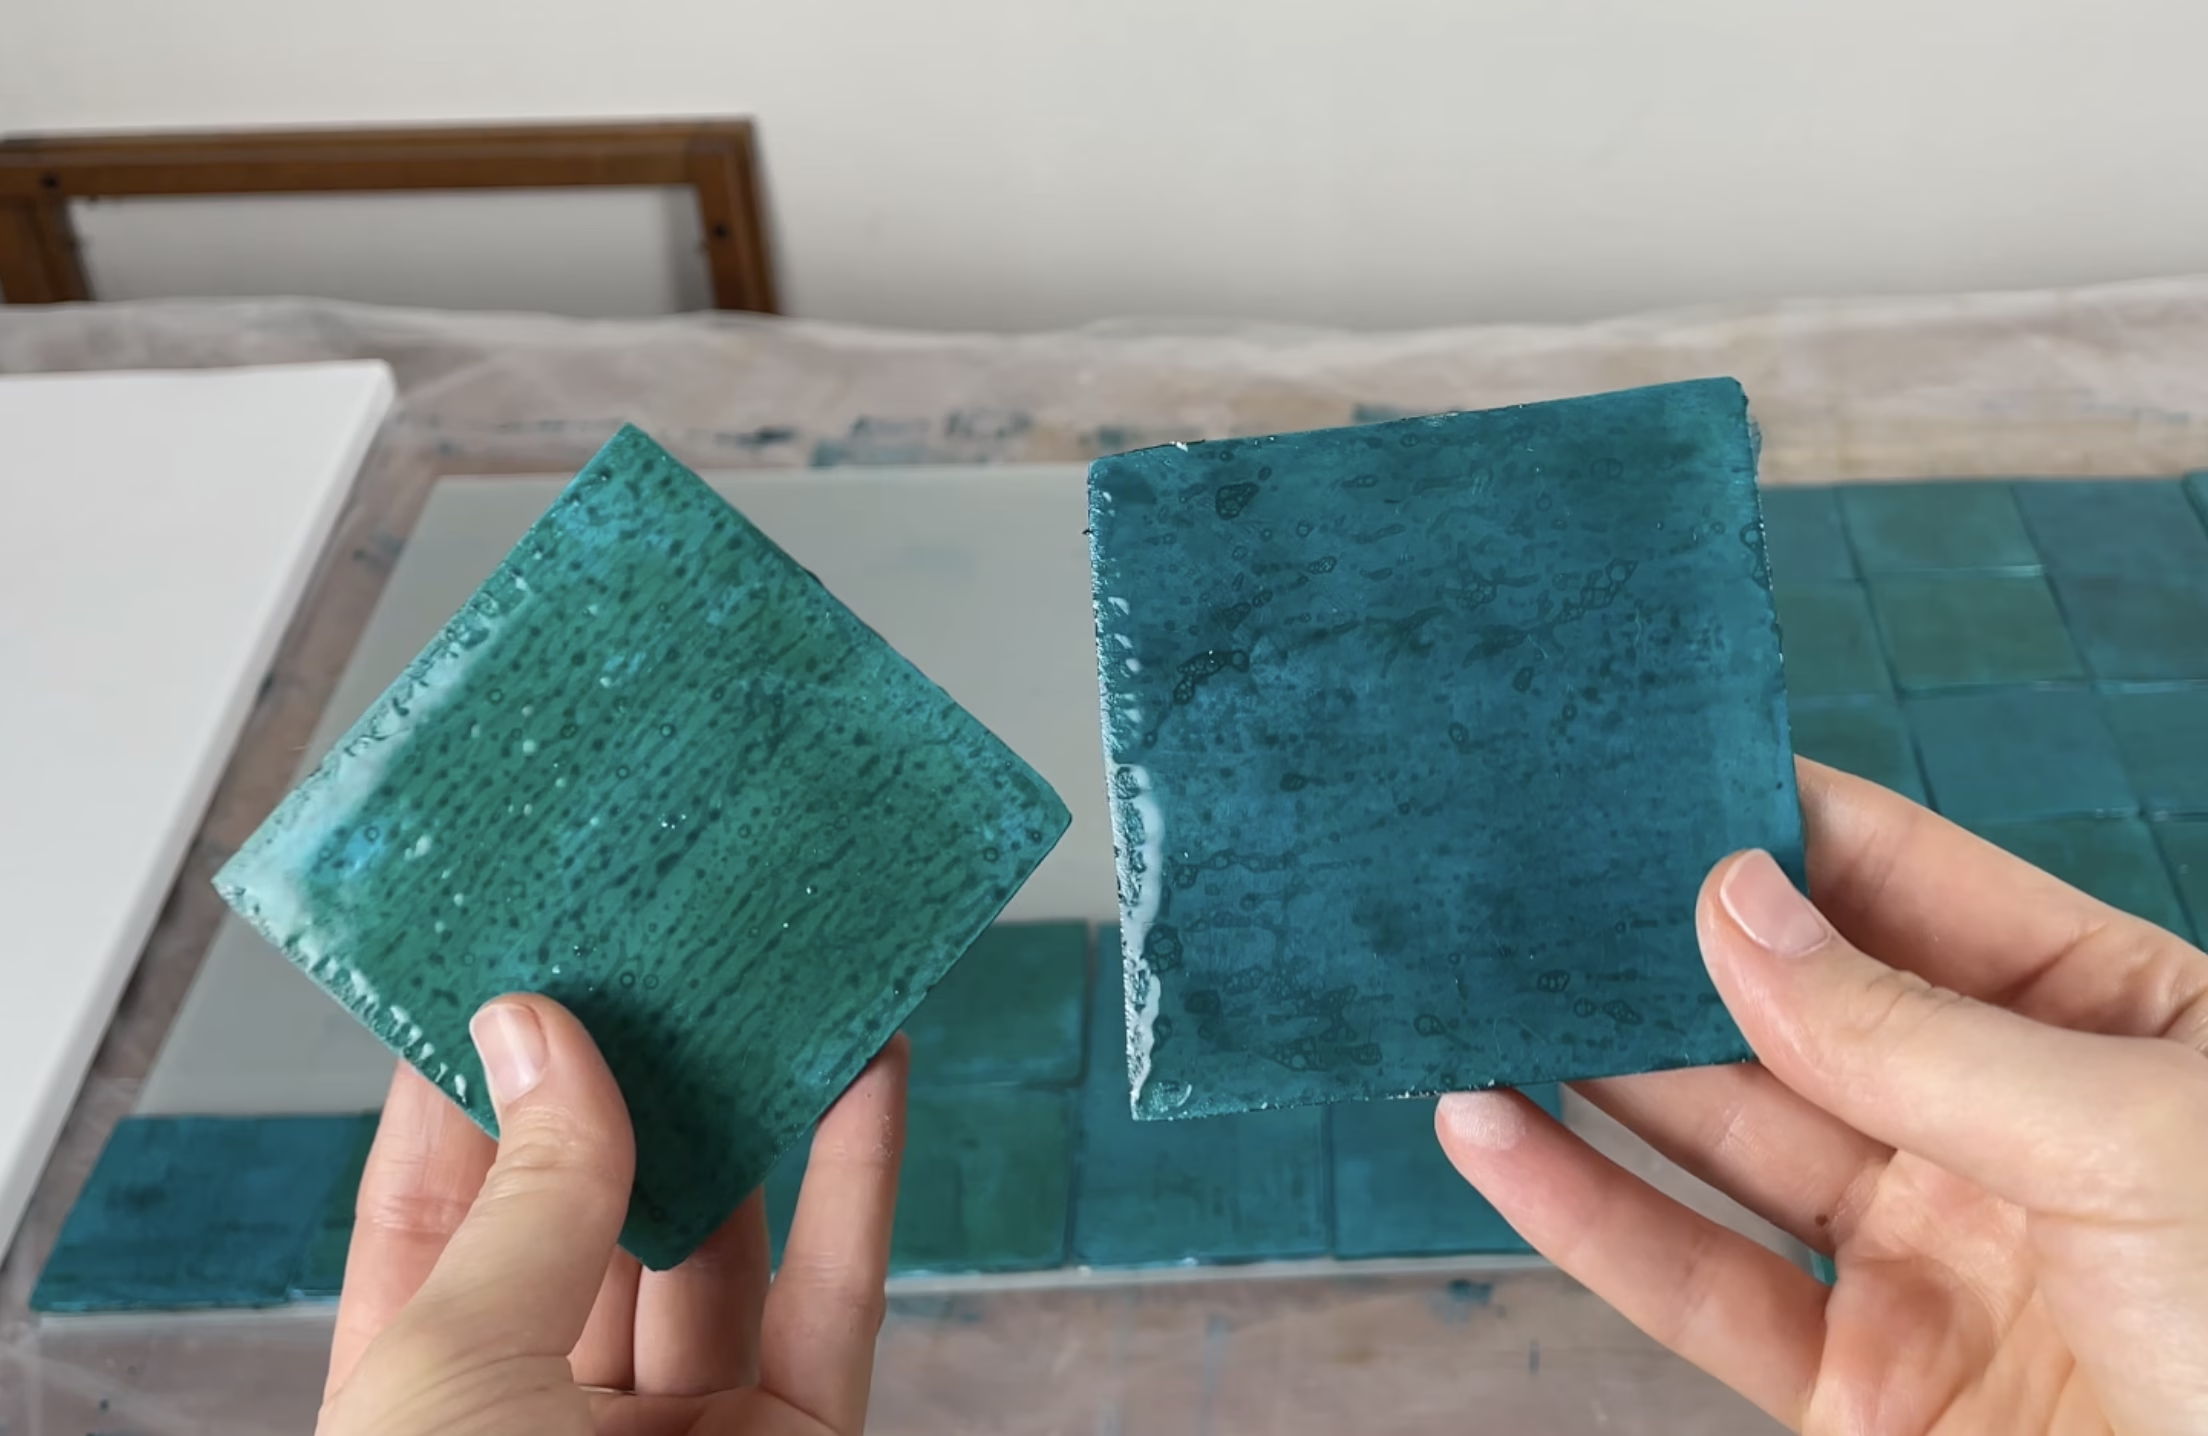
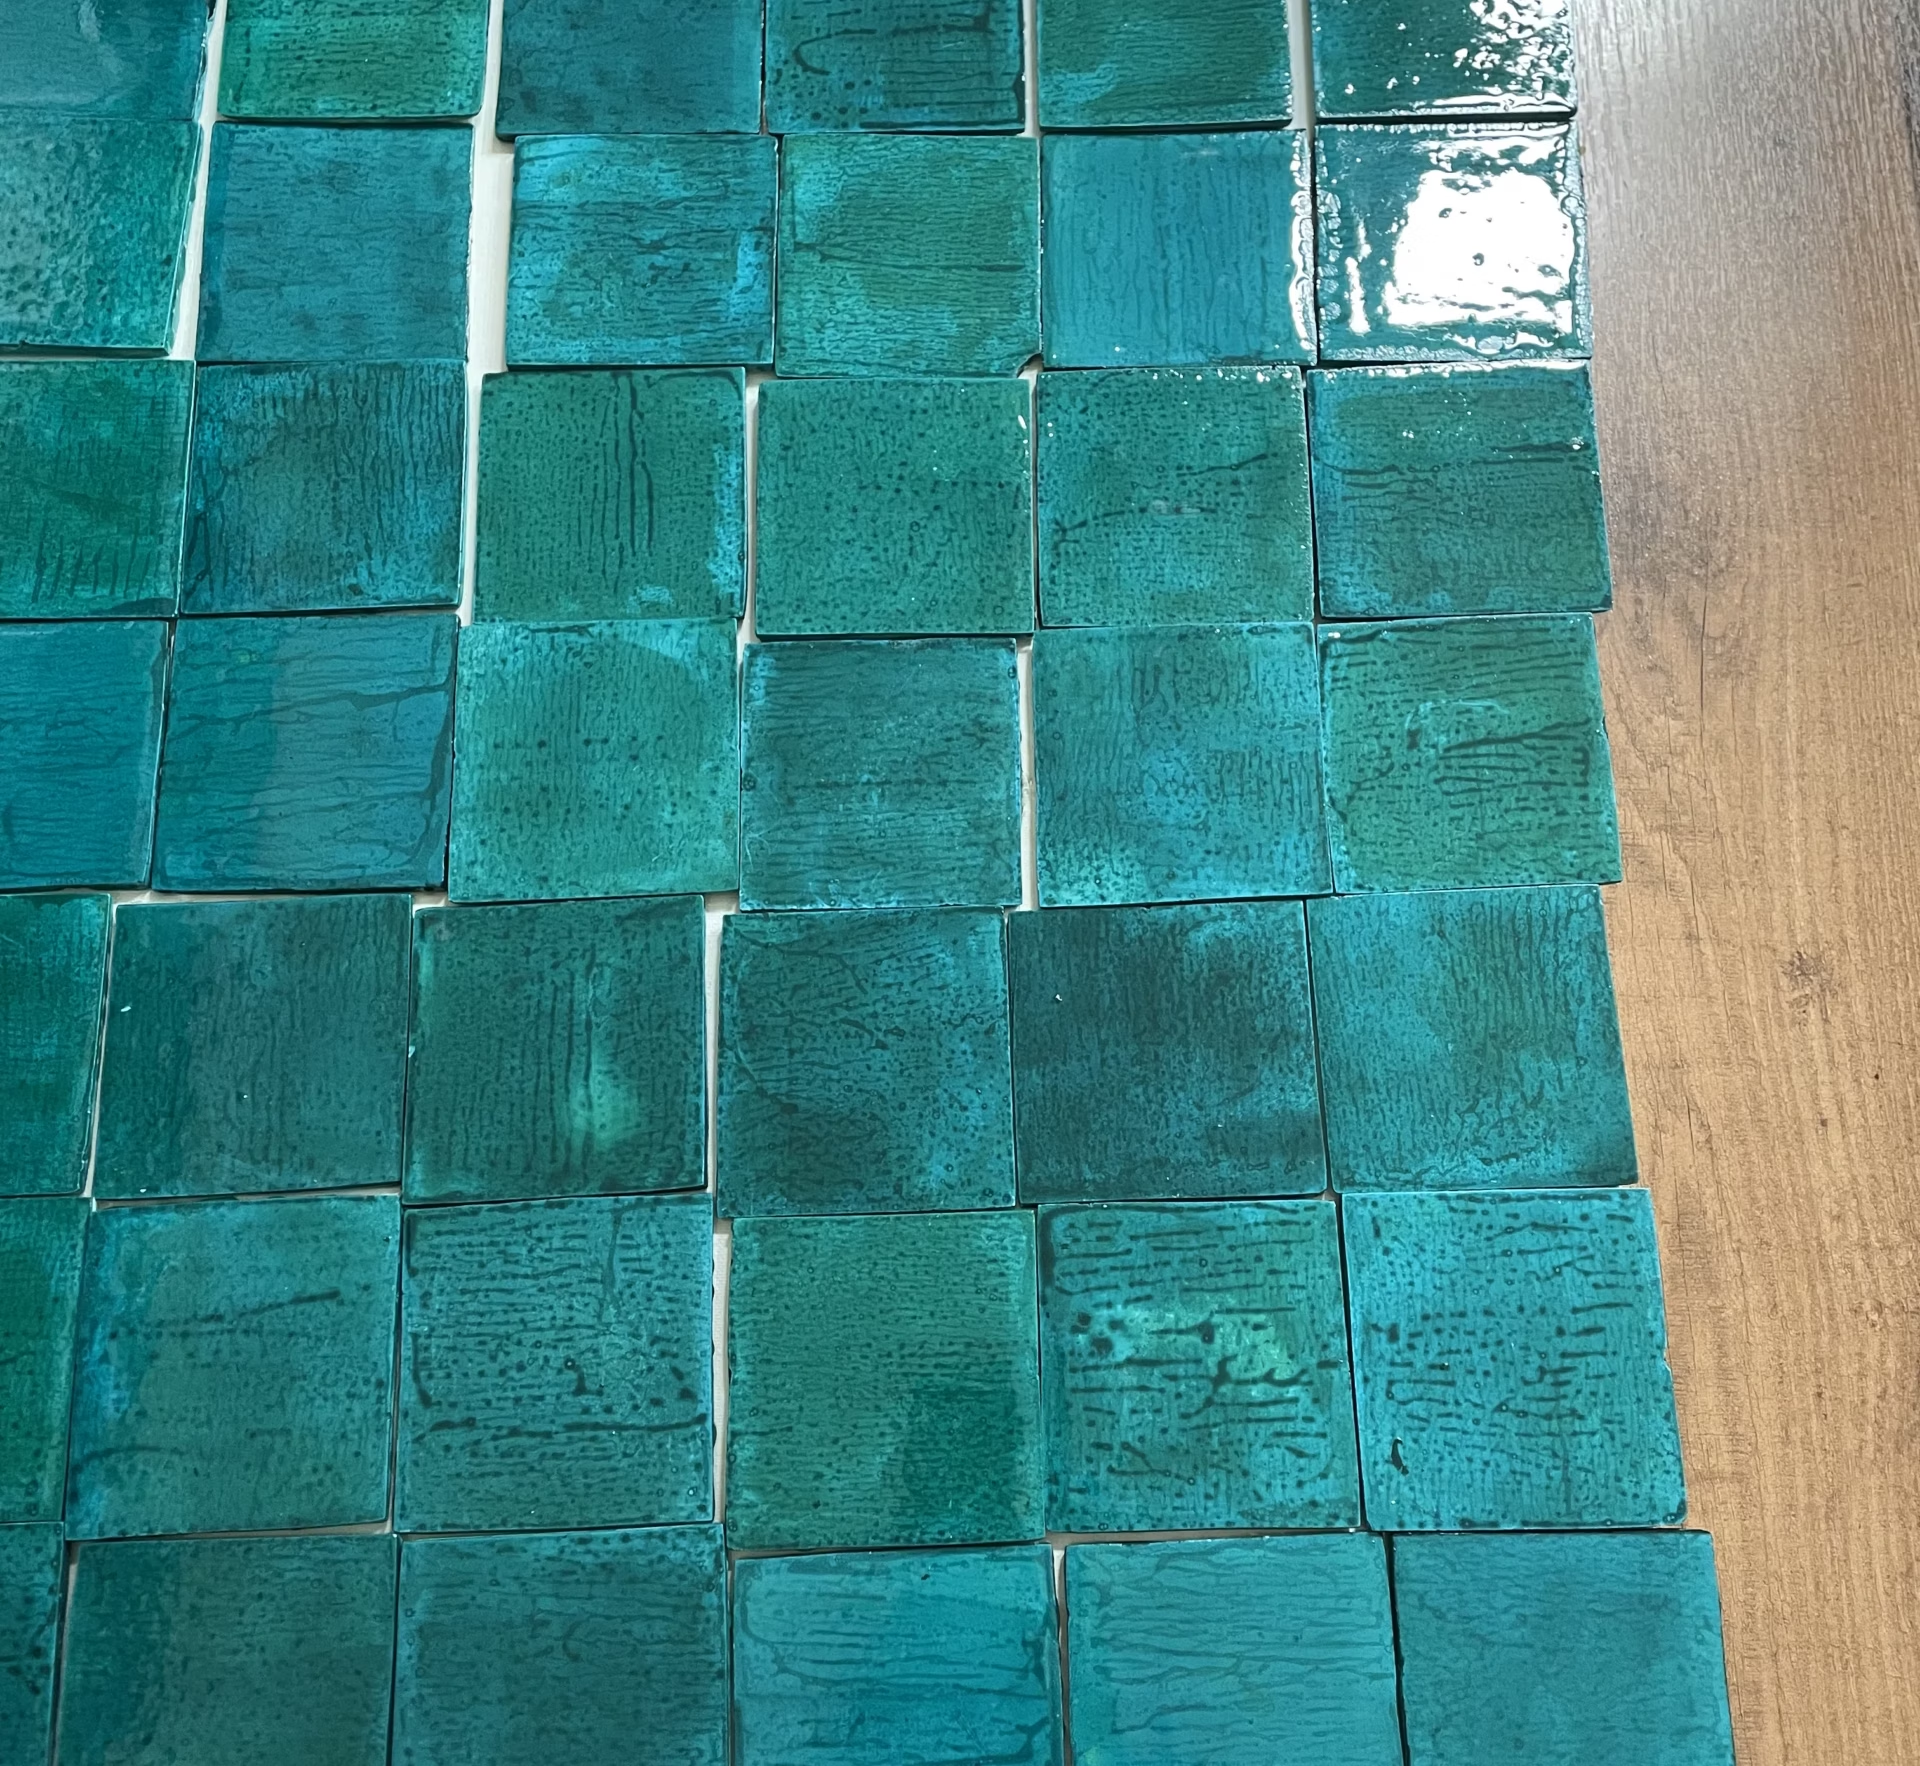
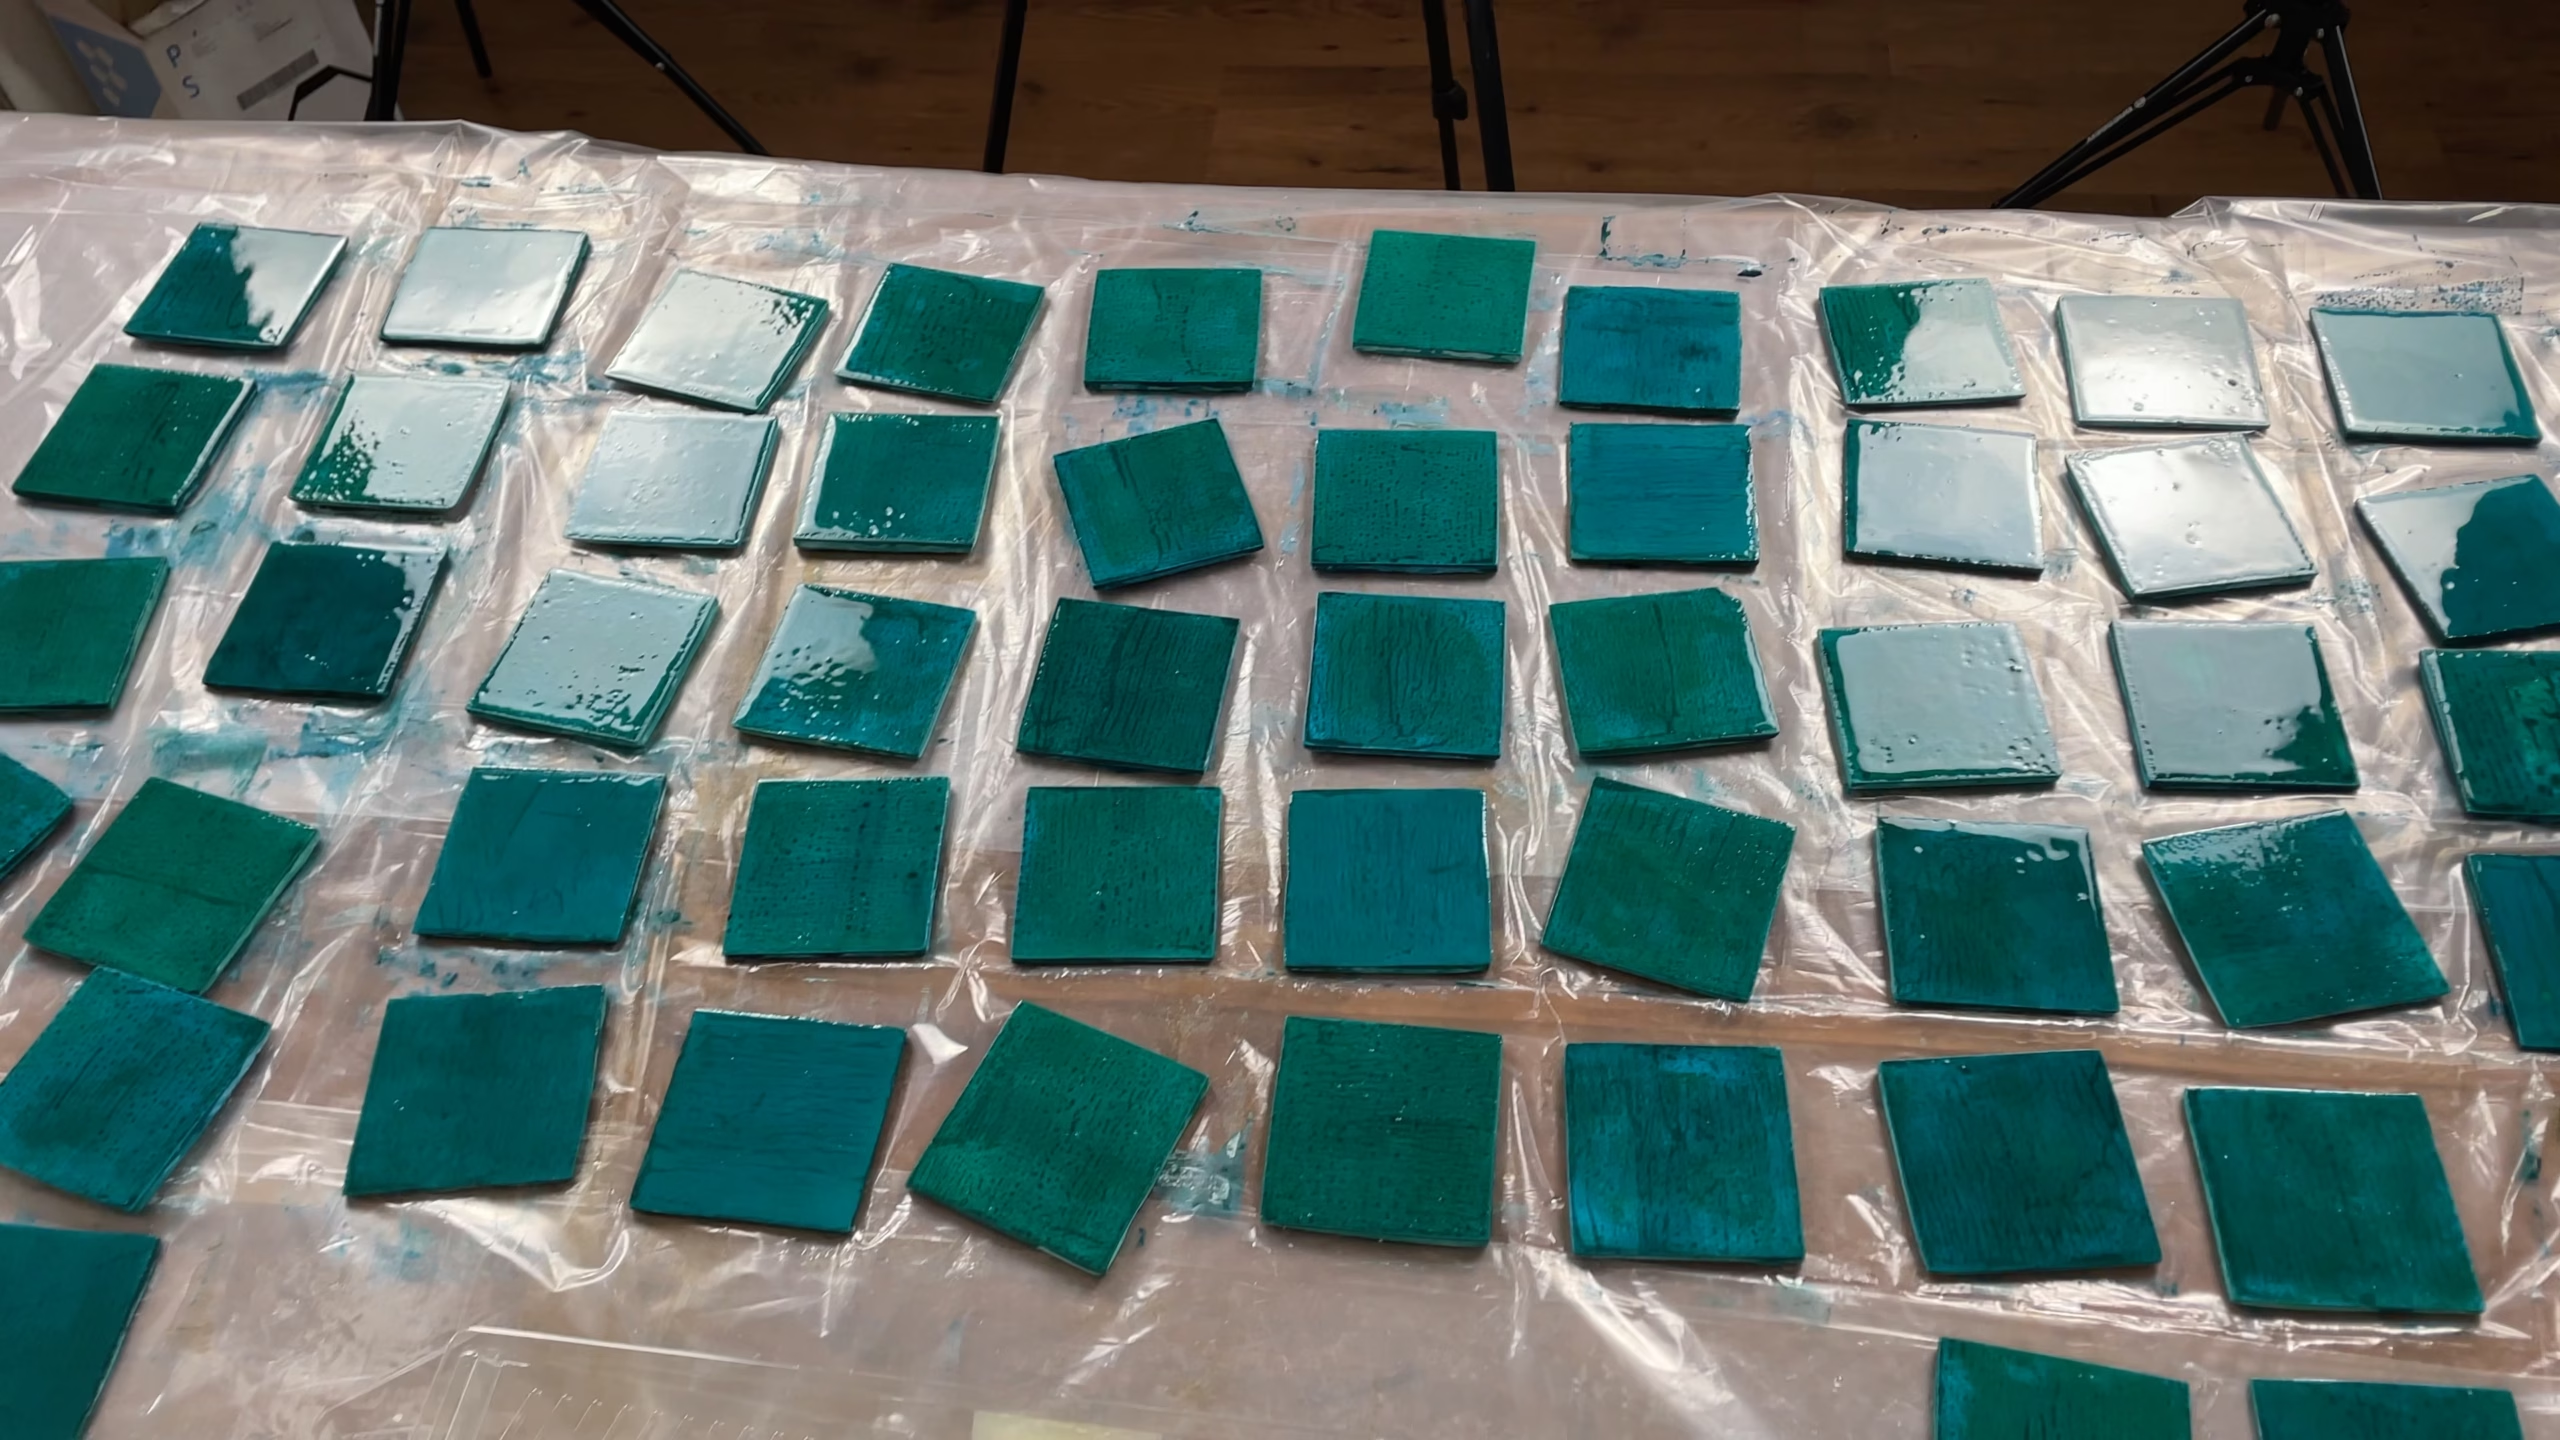
A while back, I was working on a coffee table makeover and had my heart set on a tiled top. However, the tiles I loved were out of my budget. That’s when I decided to make my own tiles using modeling gypsum (Plaster of Paris). The process was creative and rewarding, and I was pleased with the outcome. In this article, I’ll guide you step by step through how I did it so you can give it a try too.
Prefer watching instead of reading? Check out my YouTube video, where I share the entire coffee table makeover process, including how I made the tiles. (The tile-making process starts at 3:07.)
You Will Need:
These are affiliate links to products. If you purchase through these links, I may earn a small commission at no extra cost to you. Thank you for supporting my DIY journey!
- Plasticine: https://amzn.to/3BUjnXj
- Plaster of Paris (modeling gypsum): https://amzn.to/4jh9kfZ
- Sanding paper 180: https://amzn.to/48y2TzP
- Painting tray and roll (foam): https://amzn.to/3C856pL
- Acrylic paints: https://amzn.to/4e69Auk
- Epoxy top coat: https://amzn.to/3YuGUVZ
Step 1: Make the Molds
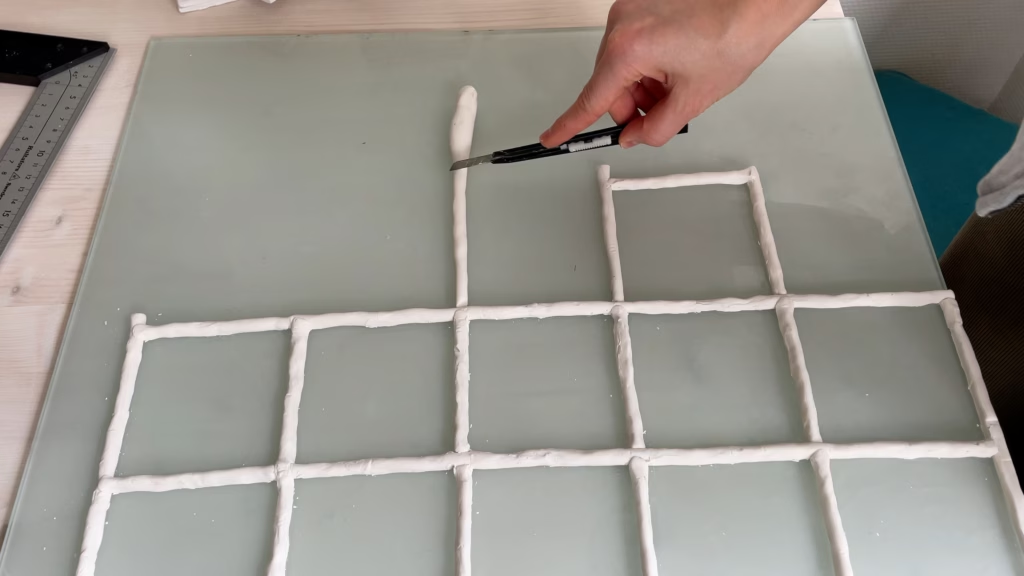
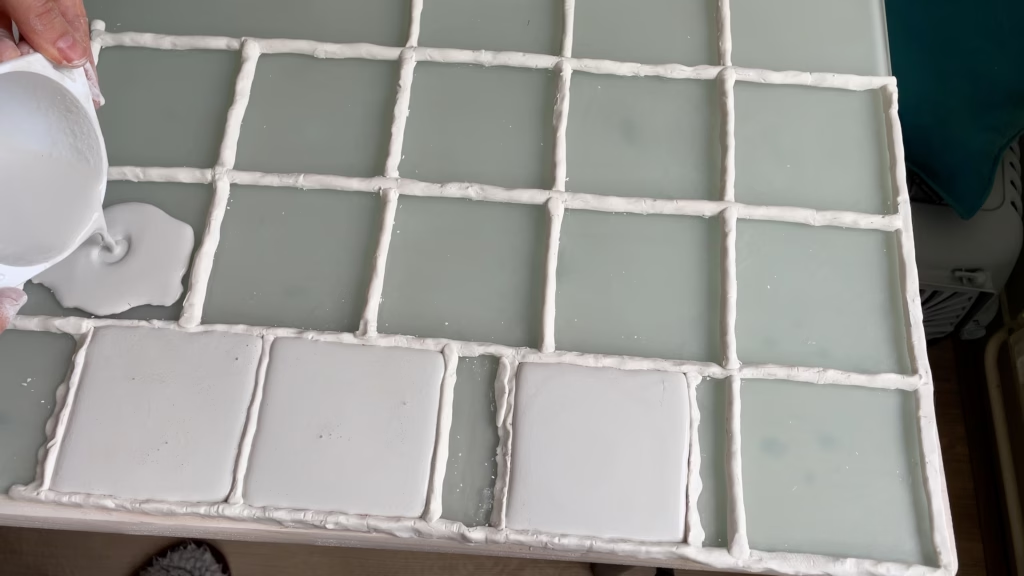
The first step was creating molds for the tiles. I made about 10 molds at once, allowing me to cast multiple tiles simultaneously. For my coffee table, I needed 72 tiles plus a few extras as spares—it’s always a good idea to make more than you need in case any break or don’t turn out right.
I used a glass sheet as the base for my molds, but any flat, smooth surface will work. To form the mold edges, I used plasticine, which worked well for creating sturdy borders. One advantage of making custom tiles is that you can choose the exact dimensions to fit your project. I calculated the ideal length and width to cover the table top precisely, then made molds to match those measurements. This way, I avoided the need for cutting tiles, which is often required when working with store-bought options.
Step 2: Casting Gypsum
After preparing the molds, I mixed modeling gypsum (Plaster of Paris) with water in a 1:1 ratio and poured the mixture into the molds. While gypsum sets in just a few hours, I usually wait 24 hours to ensure the tiles are fully dry and sturdy before removing them.
The next day, I carefully extracted the tiles from the molds. It’s inevitable that the plasticine borders shift during this process, but that’s not an issue. Once the tiles are removed, simply reposition the plasticine edges, wipe the glass surface with a damp cloth, and the molds are ready to be reused.
Step 3: Sanding
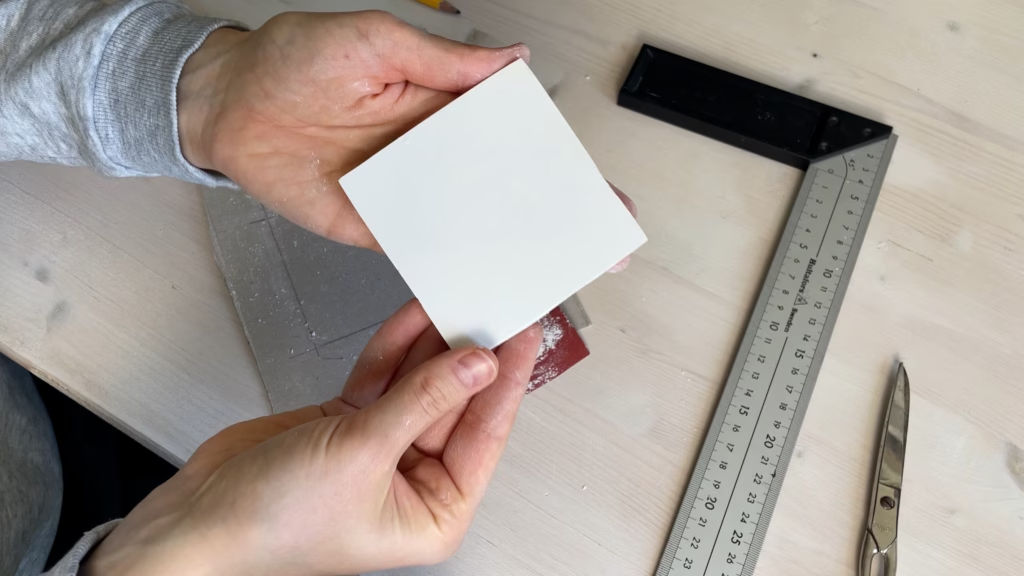
Once the tiles were removed from the molds, their edges weren’t perfectly smooth—but that’s easy to fix. I used 180-grit sandpaper to sand all the edges until they were straight and clean. To make the process easier, I prepared a piece of cardboard with a drawn outline of the desired tile dimensions. While sanding, I checked each tile against the outline to see if any sides needed additional work.
Since I was aiming for an antique look, I didn’t mind if the tiles weren’t perfectly straight or uniform in thickness. However, if you prefer a neater, more polished appearance, you’ll need to be extra careful during both the casting (to ensure consistent thickness) and the sanding (to achieve precise edges).
Sanding creates a lot of dust, so I recommend wearing a face mask and working in a well-ventilated area—or, better yet, outside.
Step 4: Painting
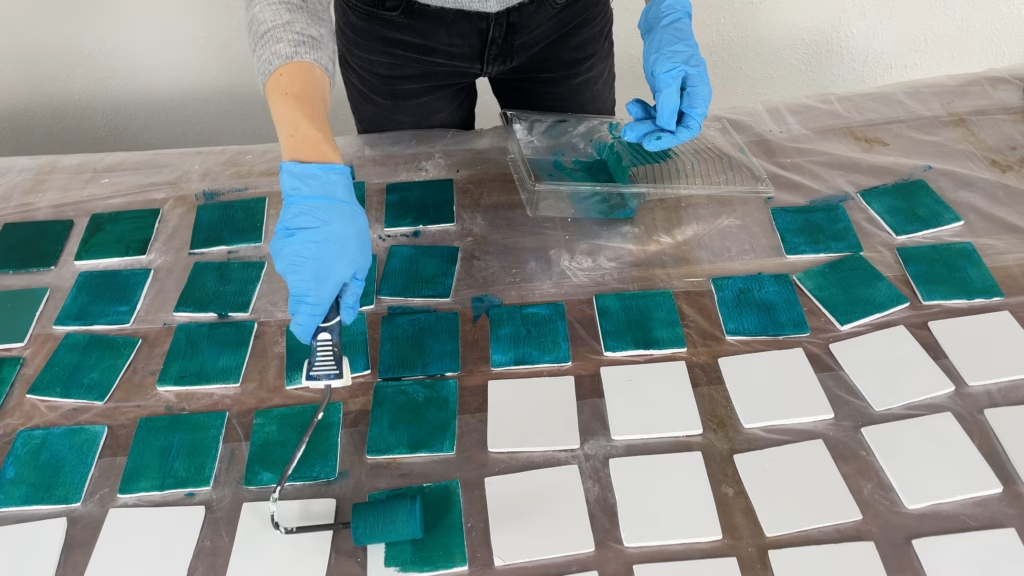
The next step was painting the tiles. Since I wanted an antique look, I aimed for uneven color distribution—and to my surprise, it was quite easy to achieve.
I started by mixing equal parts of yellow and blue acrylic paint, then added a small amount of water to thin the mixture slightly. Using a foam paint roller, I applied the paint to all the tiles. The combination of the foam roller and the diluted acrylic paint created a beautiful effect: the color didn’t apply uniformly, resulting in soft gradients and subtle shades that perfectly matched the antique style I was going for.
After painting, I allowed the tiles to dry completely, which took about 24 hours.
Step 5: Top coat
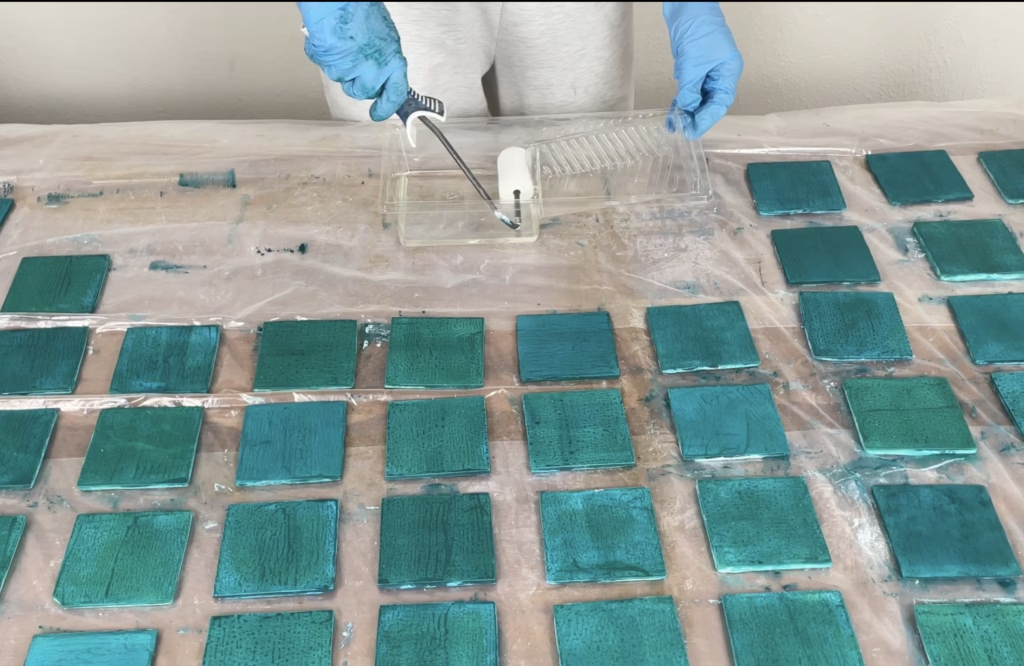
For the final step, I needed a top coat that would make the tiles waterproof, durable, and glossy. After experimenting with both acrylic and epoxy top coats, I found epoxy to be the clear winner. While acrylic top coats are less glossy and not as sturdy, the epoxy top coat gave the tiles a finish reminiscent of glazed ceramics.
Following the manufacturer’s instructions, I mixed the epoxy top coat, which comes in two parts (Part A and Part B). It’s important to mix these in the correct proportions for the best results. Using the same foam paint roller as before, I applied the epoxy top coat evenly across all the tiles.
After 24 hours of curing time, the tiles were fully ready for use.
Results
I highly recommend this method of making tiles for similar DIY projects. It’s particularly well-suited for smaller surfaces, as the casting and sanding processes can be quite time-consuming. However, if you enjoy creative, hands-on work, I think you’ll find this project as rewarding as I did.
I’ve been using my coffee table with its handmade tiles for a few months now, and I’m still very pleased with the result. The tiles have held up beautifully, and I love the personal touch they bring to the piece.
